
Nobody likes cleaning up after fishing, not even me. However, it is extremely important, so I like to make this process as quick/efficient as possible. Doing a good job on the cleanup will make your gear last a very long time and will ensure you have working/organized gear the next time you are ready to fish.
General Gear Cleanup
The goal of general gear cleanup is to remove mud, grass and salt spray from our equipment. Here are the steps I follow:
- Take your GPS, wallet, sunscreen, sunglasses, towel, hat, and keys inside your house so they aren’t in the way. Wipe your GPS and sunglasses with a damp paper towel to remove salt buildup, and remove batteries from your GPS so they don’t corrode.
- Unstrap/unload your kayak and carry it over to the grass near your garden hose.
- Unload all of your rods, kayak gear, and all other saltwater-exposed fishing gear and lay it in the the grass or patio near your garden hose.
- Wash the kayak and all fishing gear with the hose (for rods and reels, see next section, below), then spread it out on the grass or patio to dry in the sun for a few hours.
- Ensure that metal/steel items (this includes items like knife blades, pliers, and brass fittings like kayak seat clips) get a good fresh water rinse, then spray with WD-40 and wipe with a paper towel. After spraying/wiping the WD-40, wipe on a light coat of oil, like 3-IN-ONE oil or mineral oil (available at most pharmacies).
- When washing the kayak, make sure to rinse all aluminum rivets to prevent corrosion. Dump any standing water out of the footwells and then let the deck of your kayak dry in the sun.
- Empty your water bottles, rinse them out, and put them on a dish drying rack to dry.
- Once your gear has had a couple of hours to dry (or almost dry) on the concrete, put it back where it belongs. I have a good solution for storing soft gear, here.
Reel Cleanup
Nothing is more annoying than reels that run roughly, freeze up, or start to corrode. These suckers are expensive and this is arguably the most critical part of your maintenance process. I developed this process through research and trial and error, and I use it religiously. Some may disagree with this process, and to each their own – but I seldom have reel problems as long as I follow this process and am mindful to keep my reels out of the saltwater and sand (see here). Here are the steps:
- Lightly rinse or spray your reels. This means using the low pressure water that is flowing straight out of your hose, or using a nozzle with a light mist. I have heard some folks say that they do not believe in using water (one person I know simply sprays his reel with Windex), but I am a long-time believer of using water, and it gives me the piece of mind that I am removing salt crystals from the reel, particularly where the line lays against the spool. The key though, is that you do not want to use a high pressure stream. It is has been said that a high pressure water stream drives sand and salt deep into the reel where it can cause damage.
- When rinsing your reels, pay particular attention to the spool (and on spinning reels, the roller as well). The spool/roller is holding line that was in the saltwater, and needs to be rinsed well.
- After rinsing, dry the reel with a paper towel and spray the entire surface of the reel with WD-40 (including the spool/line roller), then pat with a paper towel.
- Lubricate the reel with a single drop of reel oil in all locations recommended in your owners manual. Here is an example of how I do it, but make sure to follow YOUR owner’s manual. On a baitcasting reel, remove the side plate and spool, then oil: 1) all accessible bearings, 2) the levelwind grooves; 3) the inside of the pinion gear; 4) the spool release button; 5) the rotating handle. On a spinning reel, remove the spool and handle, then oil: 1) all accessible bearings, 2) the main shaft; 3) the line roller; 4) the rotating handle.
Hooks and Terminal Tackle
Hooks and other tackle cost money, so I try to make them last as long as possible. Even if I did not submerge my tackle box during the trip, there is a good chance that I changed baits at least once, meaning that a “salty” bait was returned to the box. Therefore, I like to wash the entire box to ensure that the one salty bait does not cause other tackle to rust. Here are the steps:
- Open your tackle box and rinse all terminal tackle with fresh water. After rinsing, you can drain most of the water by closing the lid and turning the box upside down, then leaving a little crack in the list for the water to flow out.
- Put a piece paper towel on your workbench or table, and and lay all terminal tackle out on the towel.
- Spray all metal tackle pieces with WD-40, paying particular attention to hooks, swivels, and spoons. You will get spray on your plugs and soft plastics baits and this is OK. The WD-40 will help the metal tackle to last much longer and the scent will not scare the fish away. Like this:
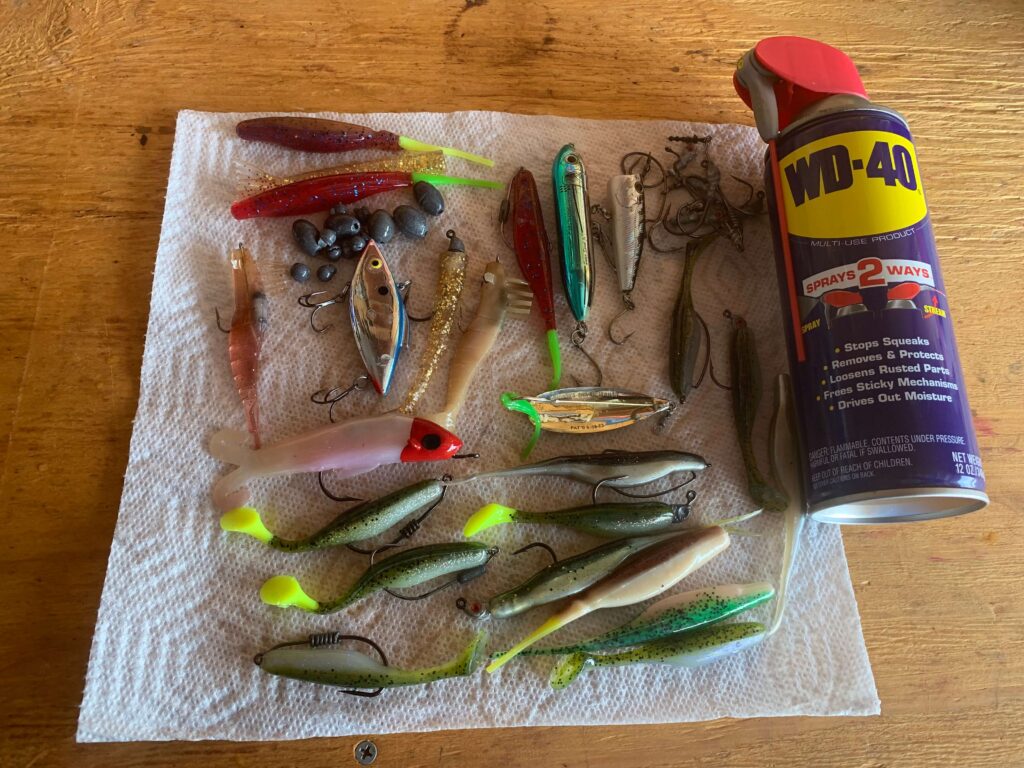
- While your terminal tackle is getting the WD-40 treatment, put your empty tackle box out in the sun or upside down to drip dry.
Rod Cleanup
Rods are simple to cleanup up because there are no moving parts, but the guides are most definitely subject to corrosion (I have had cheaper guides corrode completely through, even when rinsed with freshwater after each trip). Therefore, my rod maintenance comes with two key steps and one optional step:
- Rinse the rod and each guide with the hose; make sure to get all of the guides.
- Dry and spray each guide with a quick shot of WD-40.
- Remove the reel from the rod, and polish the rod and reel seat with Pledge furniture polish. This is optional but it is a good idea to do it from time to time to keep your rods looking nice.
Thoughts on WD-40
There are much fancier, and possibly better, chemicals available out there than WD-40. One well-known example is Corrosion X, but there are several others. I’m sure they are excellent, but my biggest hang-up with them is the cost. Spending a lot of money on chemicals just doesn’t align well with “keeping fishing affordable”, one of the key concepts of this site. Now, if I owned a very expensive reel then I might play it safe and consider a better chemical, but for my workhorse reels (see here), I use WD-40 and it works just fine.
WD-40 does a few great things that are beneficial to us fishermen. One, it displaces water. Second, it penetrates rust and corrosion. For example, if you spray a sticky door hinge with WD-40, it will penetrate any bits of rust inside the hinge and the hinge will instantly start moving more freely. Third, it provides a barrier that prevents rust, at least for a while, until in evaporates.
It is not technically a lubricant, it is a solvent. Actually, it cuts through oil/grease and is a pretty good degreaser for cleaning up tools and such. Therefore, after I spray an item with WD-40, I wipe it down and then lubricate with actual oil like 3-IN-ONE oil or mineral oil. The oil serves as the actual lubricant. Also, while WD-40 provides a rust barrier, it is only temporary due to its willingness to evaporate, therefore the oil provides a longer-term barrier.
Using a shot of WD-40 with some 400 grit sandpaper or steel wool is a fantastic way to remove rust from gear like knife blades and pliers. Some folks see this type of gear as “disposable”, but not me. I have wading pliers and filet knives that have been going strong well over 20 years, because if I noticed any rust buildup, I would simply spray WD-40 and knock the rust off with sandpaper.
Thoughts on Reel Oil
I haven’t tried every type of reel oil out there, but I’ve used Penn reel oil. It worked fine. I’ve used Daiwa reel oil, it worked fine too. Currently I am using a bottle of Reel Butter, and it’s….fine. For our purposes as simple fishermen, I think they are all OK, just check reviews before you buy. You don’t need super fancy stuff, just a reliable reel oil. Nuff said.
By following this post-trip maintenance routine, your gear will last much longer and will be reliable when you need it to be.
Have a reel good day,
– The Simple Fisherman