
Almost all soft plastic fishing lures can be rigged with a jighead. The process is the same for all of them, with the exception of the old school shrimp tail, which requires slight modification.
Our primary goal when rigging a soft plastic bait is to get it to do what we want in the water and look good to the fish. We can achieve this by selecting the correct size/weight jighead, and then threading the plastic onto the jighead as perfectly straight as possible.
Selecting a Jighead
The long-standing advice is to use either a 1/8 oz or 1/16 oz jighead for nearly all of your fishing. I agree with this advice and it has served me well. The idea behind using 1/8 oz and 1/16 oz jigheads is that it gives you enought oomph to cast, but still allows your lure to swim, dart, and free fall without sinking like a brick.
I prefer jigheads without paint, eyeballs, or other embellishments. The fish may or may not care, but I just prefer to keep it simple and I have always had great luck with plain lead heads. I also prefer jigheads that lock into the plastic bait with either lead or wire barbs, not the coiled wire lock (the “laser lock” style). I think standard barbs are easier to rig. Finally, I prefer jigheads with black coated, wide gap, rounded J hooks. Currently, the Mirrolure brand jigheads fit all of these preferences and I have been happy with them.
Threading the Bait
Threading the bait typically involves poking the jighead’s hook into the front of the bait, guiding the hook point through the inside of the bait (towards the tail) as straight as you can, then poking the point through the top side of the bait at the “exit hole”.
To start things off, we must first mark the exit hole. You can use a Sharpie, or the point of the hook itself; it doesn’t really matter as long as you can see it. Or, for baits that have segment lines like the Berkley Gulp, you can just take a mental note of there the hook will exit, and don’t have to mark it at all. Lay the jighead along the top of the bait as a reference, ensuring that the front of the bait is flush with the back part of the head (green arrow). The lowest point of the hook curvature is where the hook will exit the bait (red arrow).
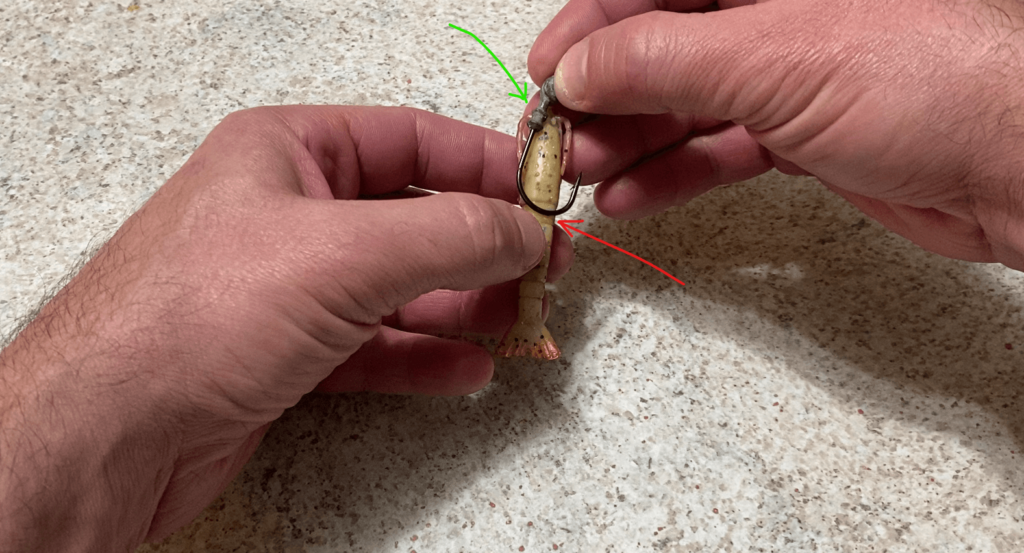
Note that in the photo above, the hook should exit about the middle of the first segment. Next, we’ll begin the threading process.
There are a few key things to note when you begin the threading process:
- Go nice and slow. If you rush, you’re likely to screw it up.
- Hold the hook firmly, and thread the bait onto the hook. Don’t thread the hook into the bait.
- It can help to hold the bait straight up and down, so that gravity will help keep the body of the bait straight.
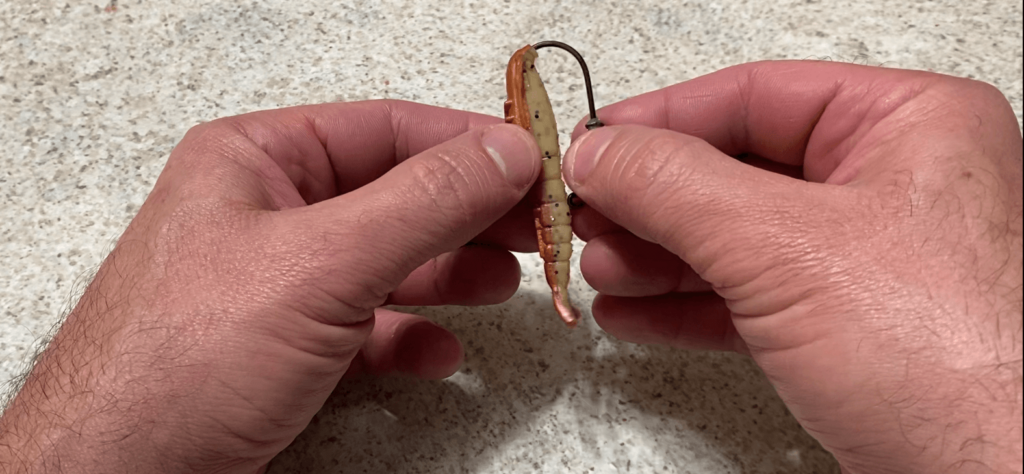
Next, we’ll continue the threading process, and will work the hook point further into the bait.
Once we get the hook point roughly even with our pre-determined exit point, we carefully bend the bait until the hook point starts showing through the exit point (red arrow):
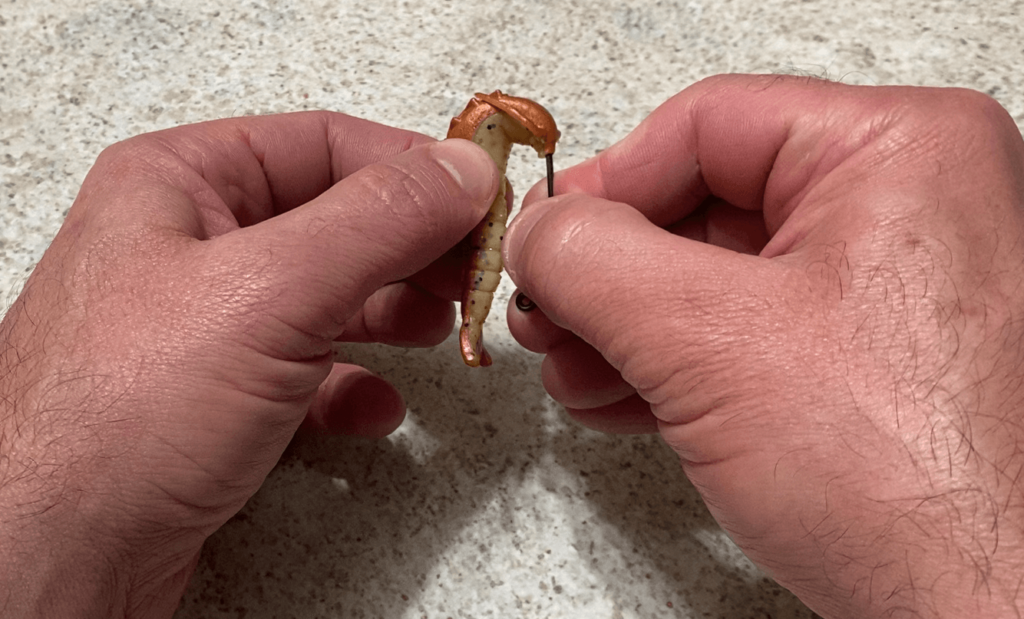
Keep threading and start pushing the bait onto the lead head:
Almost there:
Done:

Keep It Straight
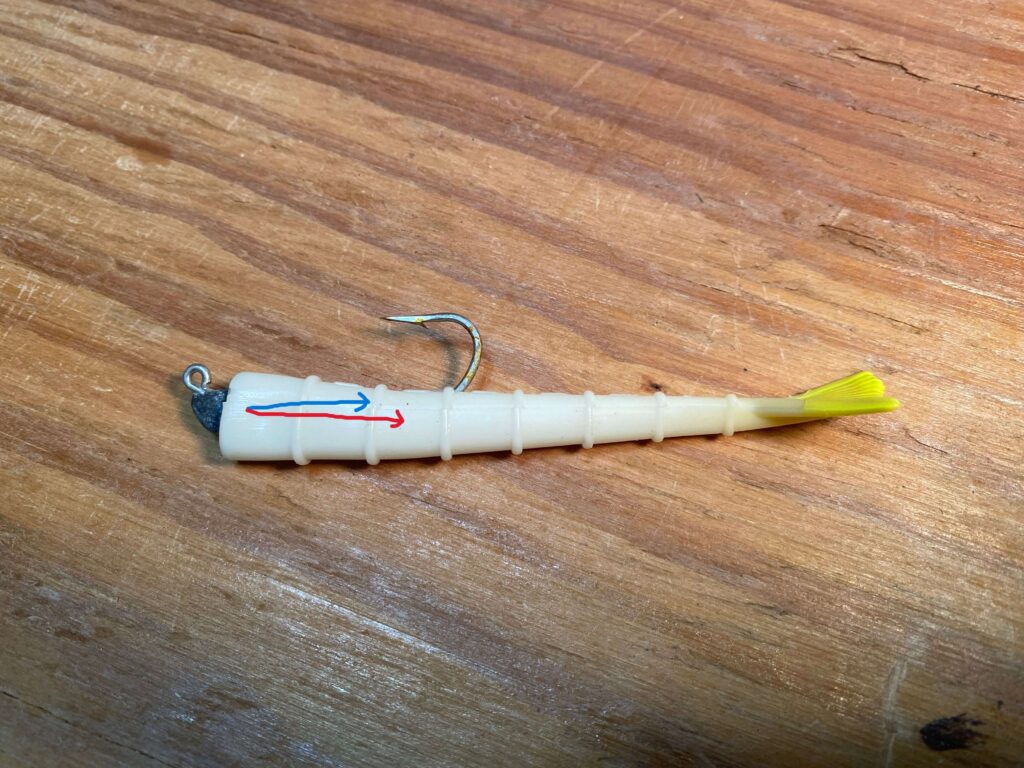
When threading the hook, it is very important to keep the shank of the hook right down the centerline of the bait. Keeping the bait centered in the left/right direction is not too hard, and you can check this by looking at the bait from the top. In this example, the blue line shows that the hook shank is centered in in the left/right direction:
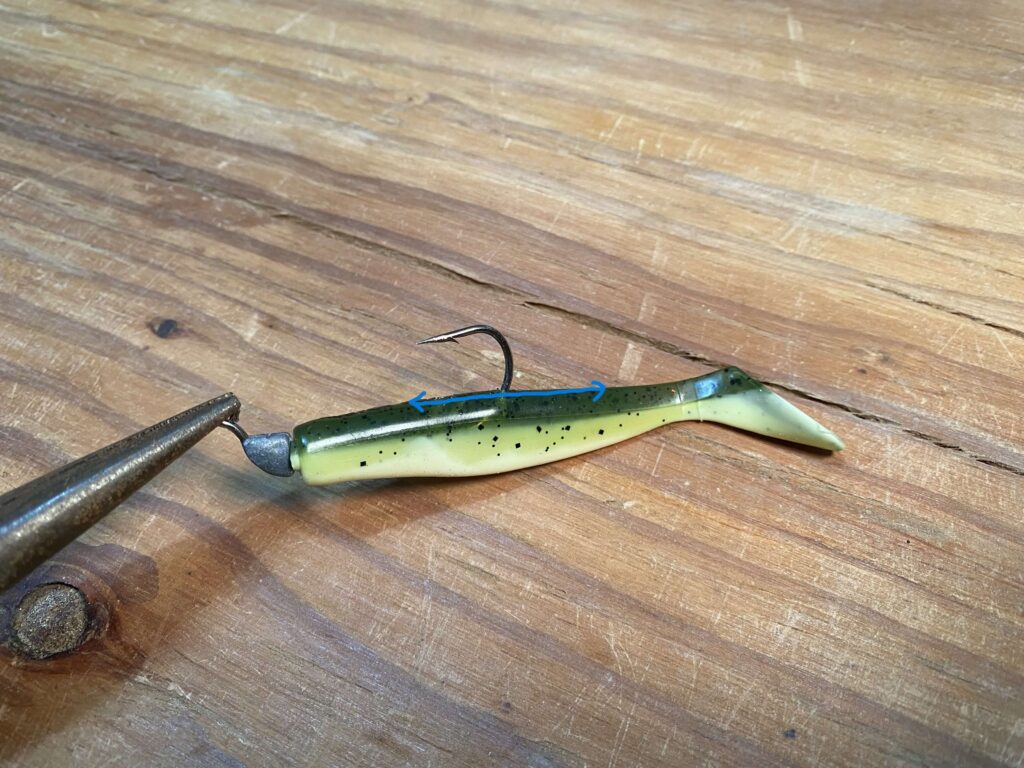
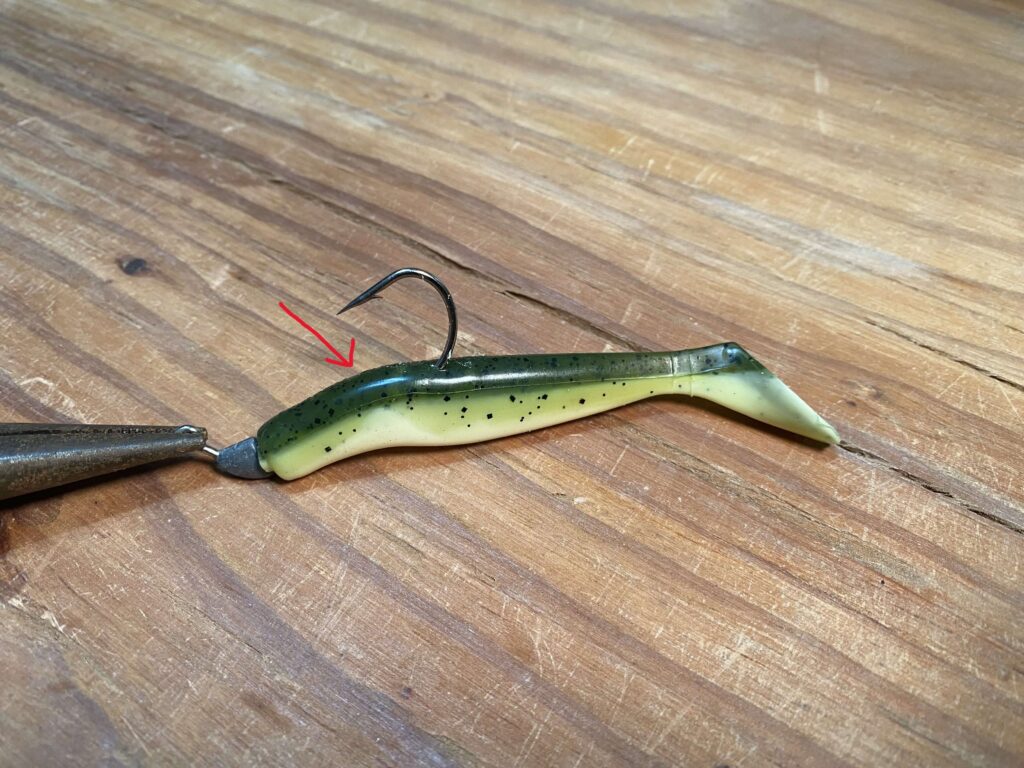
Keeping the bait straight in the front/back direction is a little harder, because it is dependent on your hook exit point. This picture shows a bait that is straight in the front/back direction (blue arrow):
This picture shows a bait that is not straight in the forward/backward; in this picture, the hook exited too late, and there is too much plastic between the lead head and the hook exit point, resulting in a dished back (red arrow).
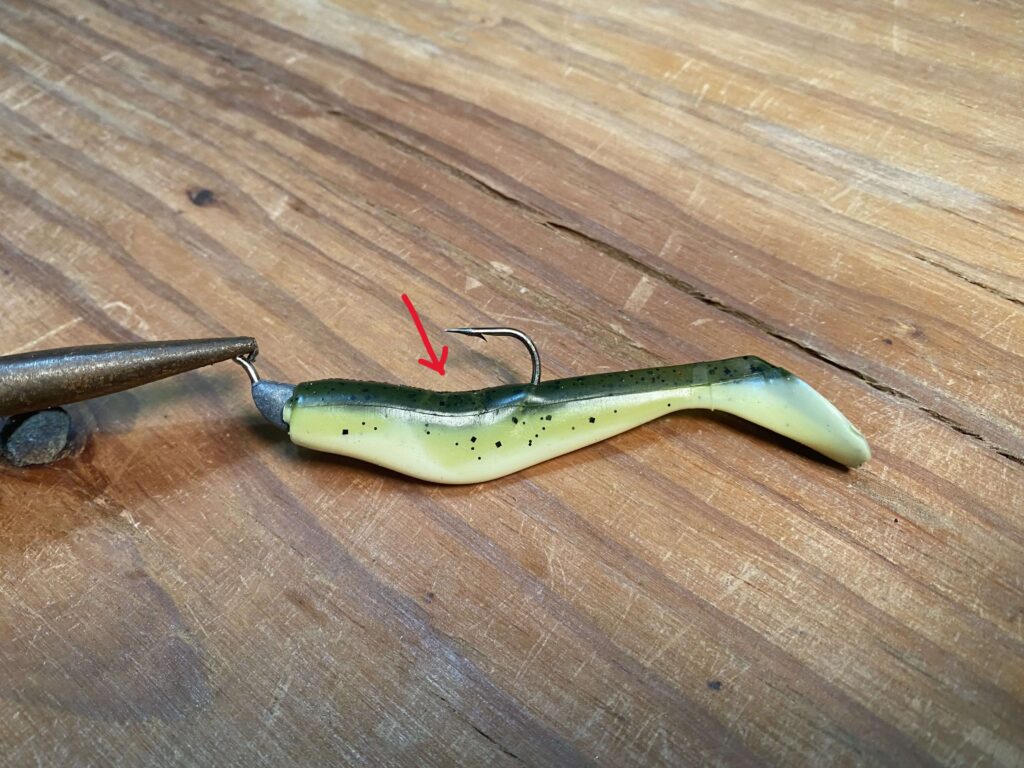
This picture also shows a bait that is not straight in the forward/backward direction; in this example, the hook exited too soon, so there is not enough plastic between the lead head and the hook exit point, resulting in a hump back (red arrow).
To fix a dished back or a hump back, you typically will need to pull the hook point back into the bait, and aim for a different exit point. Another option, if the dish or hump is only slight, is to cut a “relief slot”. A relief slot relief slot relieves any tension between the plastic and the hook shank at the exit point and allows the bait to lay straight. Relief slot is shown below (red arrow):
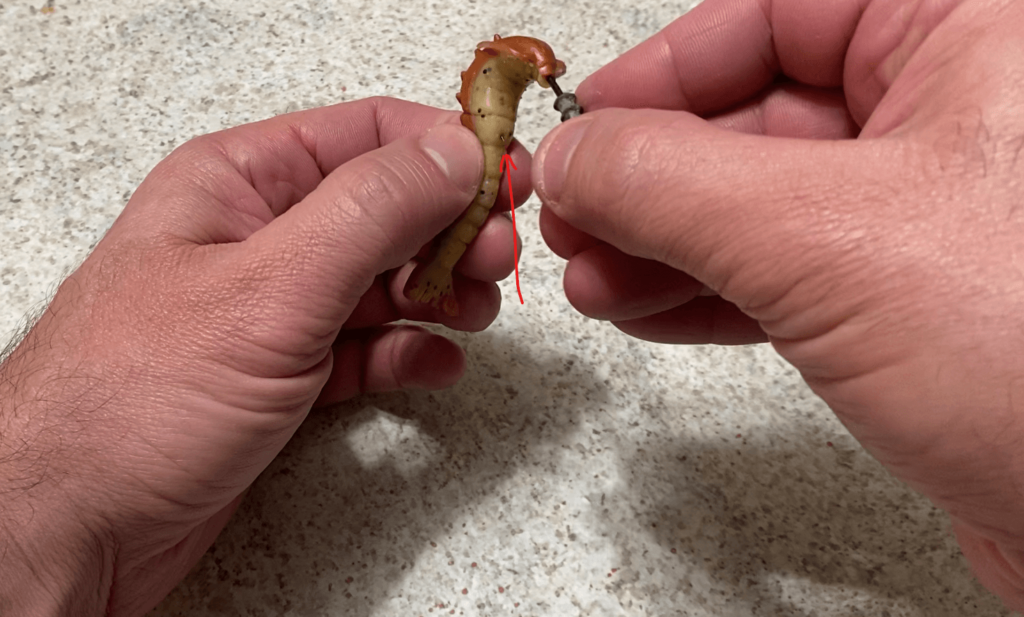
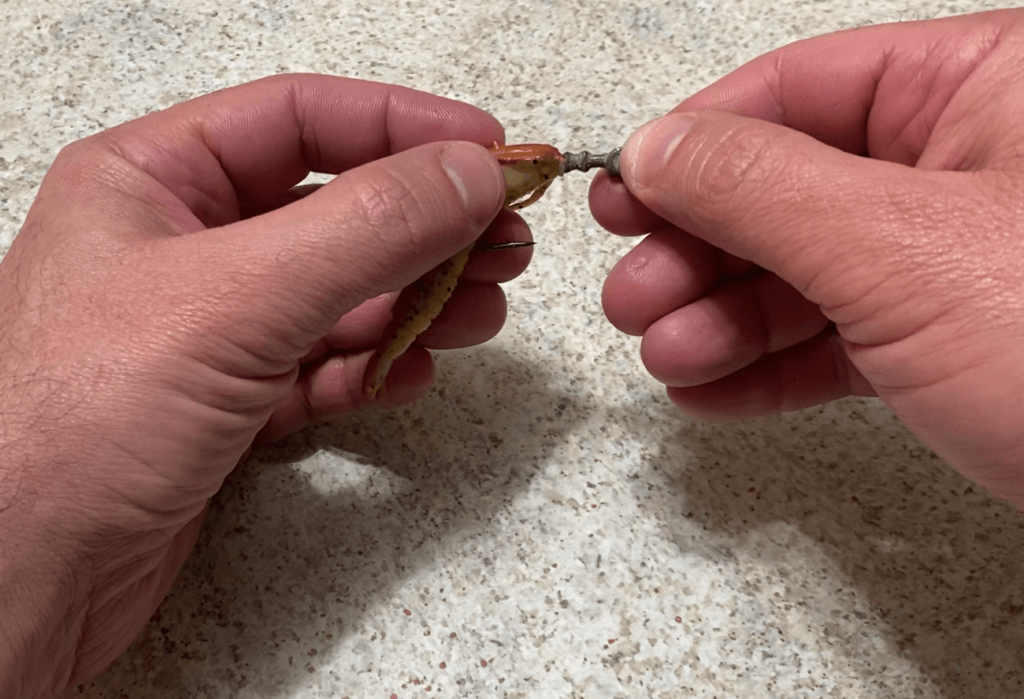
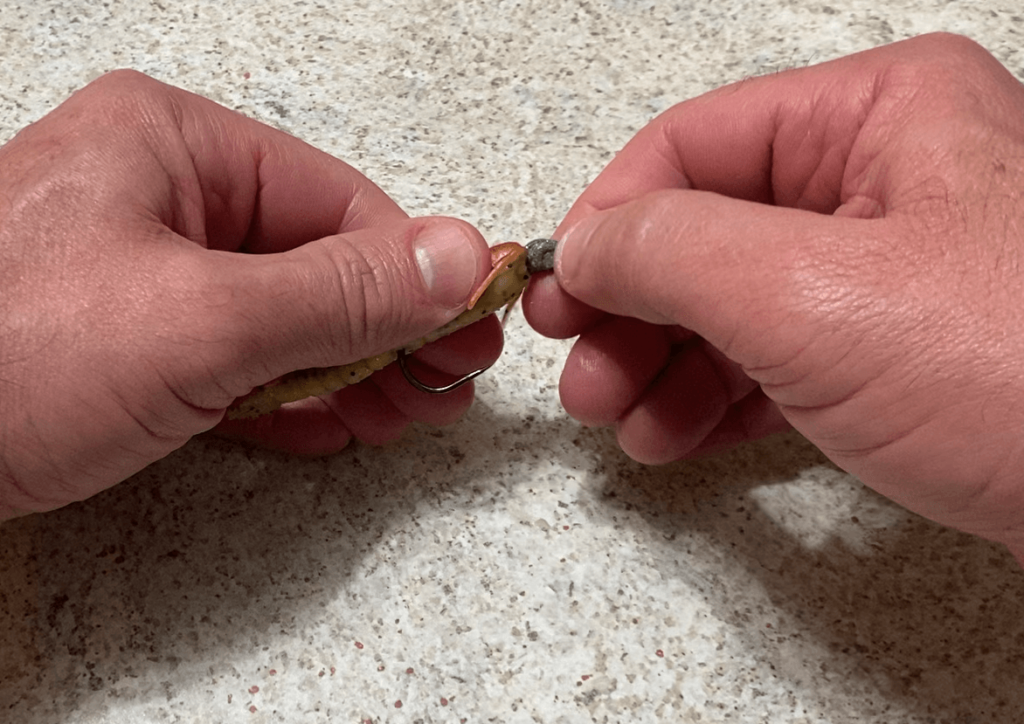
Tip for Rigging an “Old School” Shrimp Tail
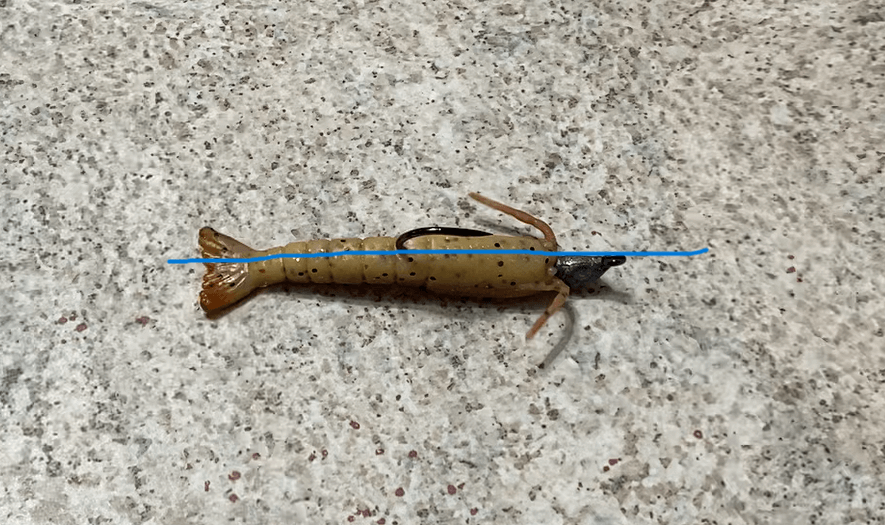
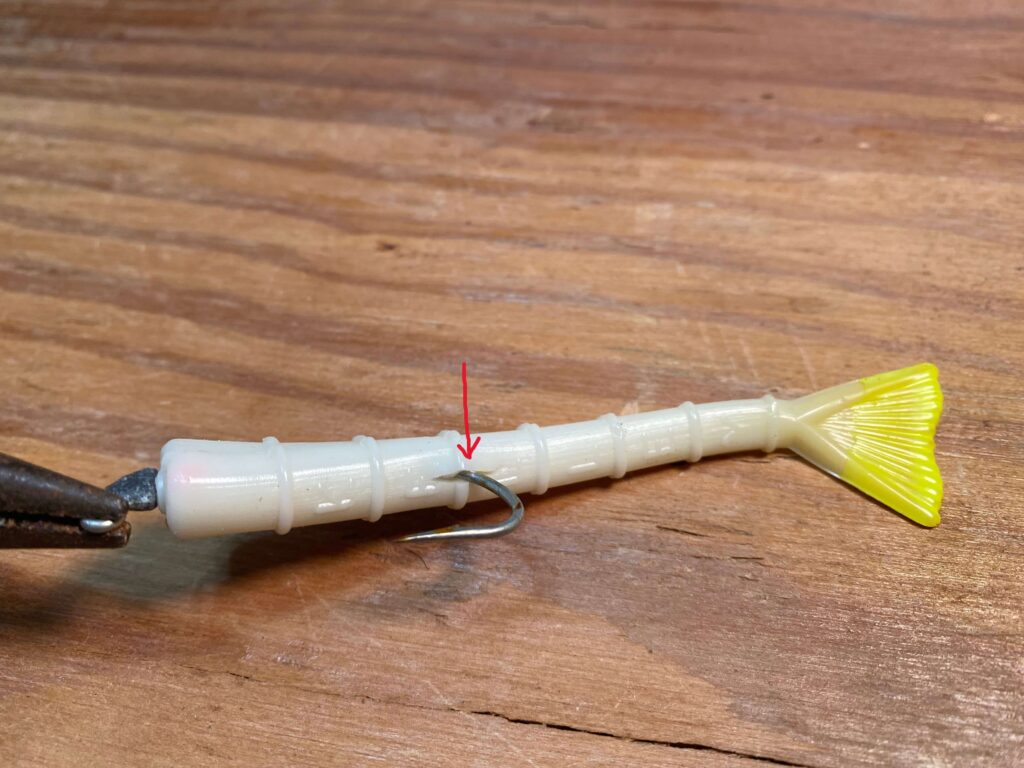
It discuss in other articles that I am a fan of the old school shrimp tail. Rigging one though can be a bit of a challenge. Instead of running the shank of the hook parallel with the top of the bait (red arrow), it is better to run it at a slight angle (blue arrow). This is because these shrimp tails are angled on both top and bottom, and running it straight into the bait can give it a bit of a hump back. This seems to be the only soft plastic that I need to do this.
That’s all for now, good luck rigging your soft plastics!
Have a reel good day,
– The Simple Fisherman